In all past tutorials, I have been using the GALV plugins for Diagonal Movement and to handle Idle / Walk / Run / Jump animations. While that worked, movement on a 2.5D map while tied to the RPG Maker Grid was clunky, and required extra work to use grid size plugins to match the 32×32 size of the graphics.
Recently, I have been switching over to the Quasi plugins to do Pixel movement instead, and letting QSprite handle the animations. As I have learned these new plugins, I have become a convert because of the smooth movement, easy access to multiple animations, and some new extra tricks I have gained from using them.
First, to get the plugins: https://quxios.github.io/plugins
There are several plugins available here, but the ones I am currently using are:
QPlus
QMovement
QSprite
QCollisionMap
You will also need the QSprite Editor to be able to us QSprite.
With QPlus and QMovement loaded and no plugin settings changed, you already have Pixel based 8-direction movement in your game. However collisions are still tied to passable / non-passable grids or events. This is where QCollision Map comes in.
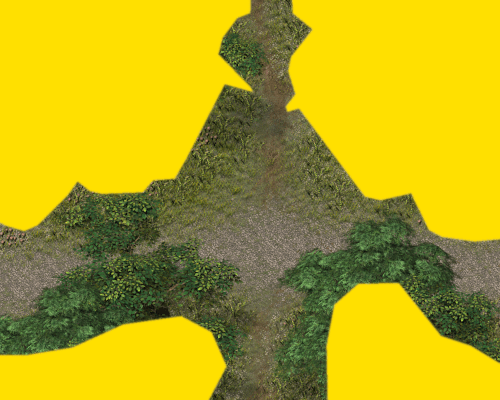
Starting with this basic map:

I then create a new layer in GIMP to design my collision map. With QCollision, any area on the collision image that is transparent will be passable, while any areas that are colored will be blocked from movement.
In the QCollisionMap plugin settings, you can set a path where the Collision Map images will be stored.
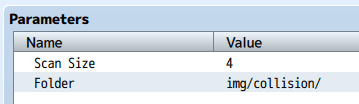
Export your Collision Map image into this folder. Personally, I like to name my collision maps with the map number so it’s easy to match them up. So the collision map for map 002 is named 002.png.
However you choose to name your collision maps, you will then have to attach it to your map through the Map Notes.

Here is an example video walkthrough of some maps set up to use QMovement.
